Food Photography Lighting Setup Guide: Perfect Shots Every Time
Master food photography lighting with our complete setup guide. Learn natural light techniques, artificial lighting tips, and pro secrets for stunning food photos.
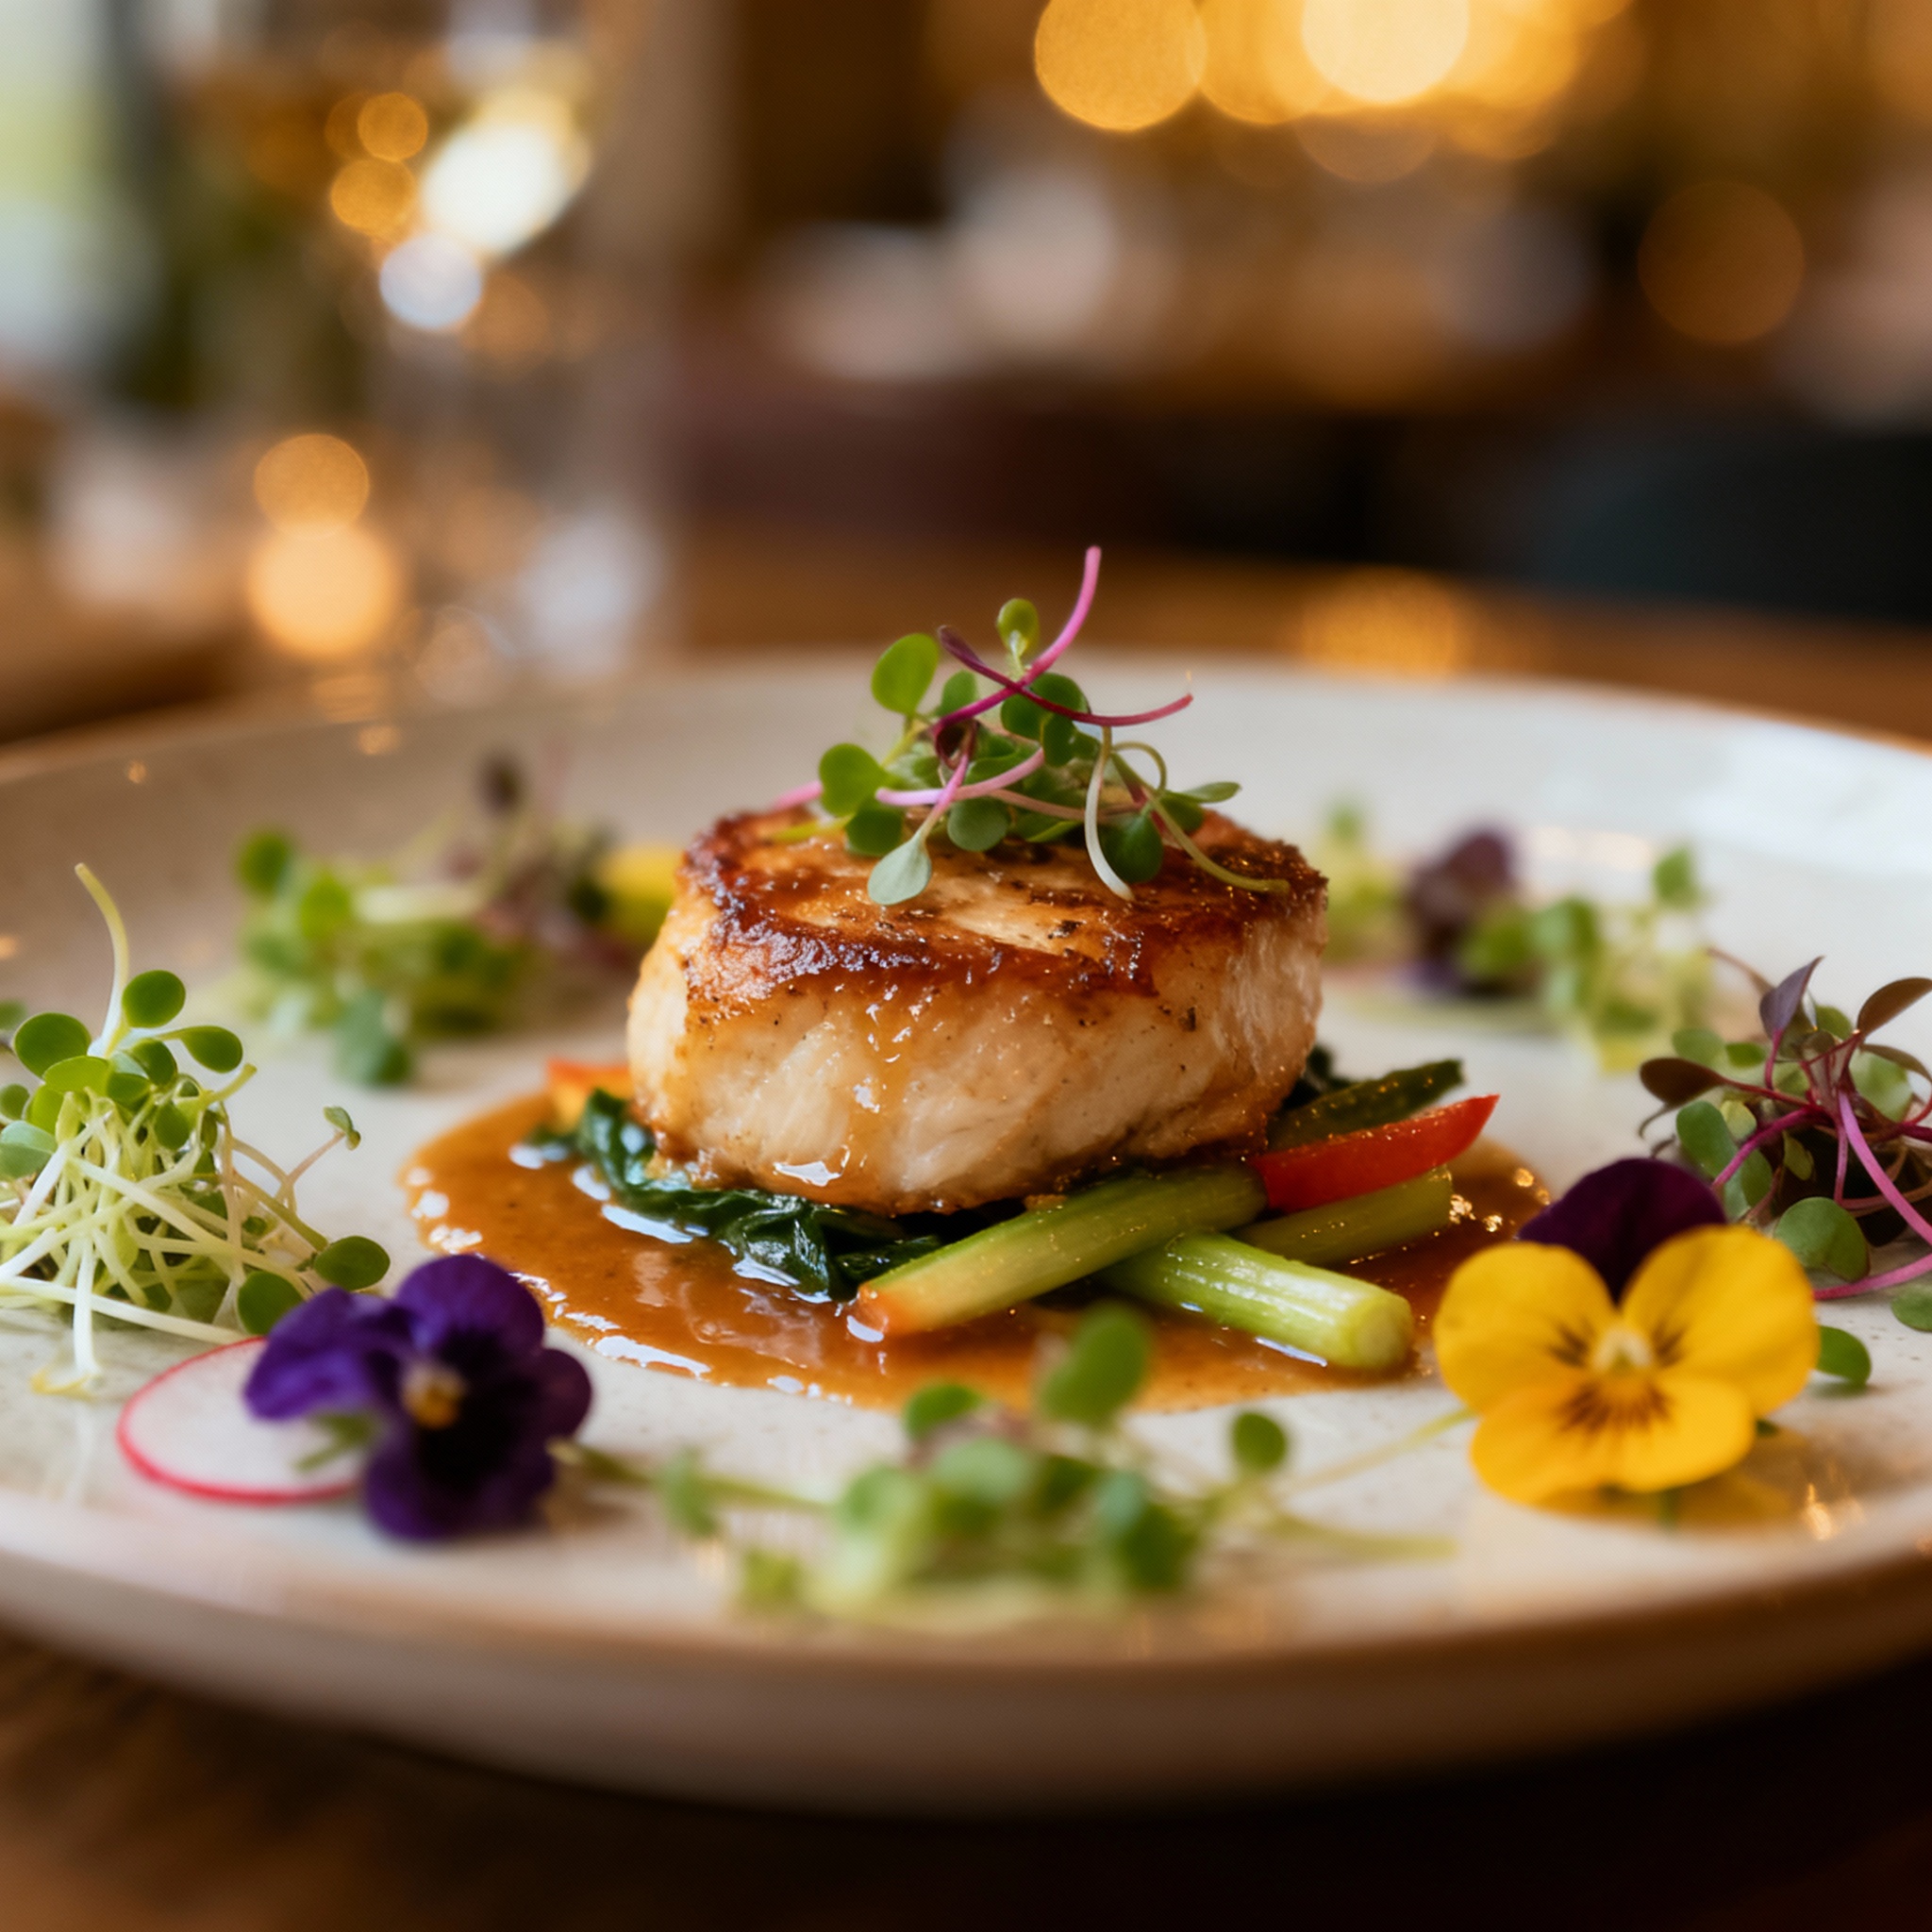
Food photography has exploded in popularity with the rise of social media, food blogs, and restaurant marketing. Whether you’re a professional food photographer, blogger, or restaurant owner looking to showcase your culinary creations, mastering lighting is the key to capturing mouth-watering images that make viewers want to reach through the screen and take a bite.
The difference between amateur and professional food photography often comes down to one crucial element: lighting. While composition, styling, and post-processing all play important roles, proper lighting can transform an ordinary dish into a visual feast that captivates your audience.
In this comprehensive guide, we’ll walk you through everything you need to know about setting up lighting for food photography, from basic natural light techniques to advanced artificial lighting setups that will elevate your food imagery to restaurant-quality standards.
Understanding the Fundamentals of Food Photography Lighting
The Science Behind Appetizing Light
Before diving into specific setups, it’s essential to understand how different types of light affect food photography. The goal is to create lighting that enhances texture, brings out vibrant colors, and creates an inviting atmosphere that makes food look as delicious as it tastes.
Food photography typically benefits from soft, diffused light that minimizes harsh shadows while still maintaining enough contrast to show texture and depth. Unlike portrait photography, where dramatic shadows might add character, food photography requires more even illumination to showcase ingredients and textures clearly.
Color Temperature Considerations
Color temperature plays a crucial role in food photography. Warm light (2700K-3200K) tends to make food look more inviting and cozy, perfect for comfort foods and evening dining scenarios. Cooler light (5000K-6500K) works well for fresh salads, seafood, and modern culinary presentations.
Most professional food photographers aim for a color temperature between 4000K-5500K, which provides a neutral base that can be adjusted in post-processing while maintaining natural-looking colors in vegetables, meats, and garnishes.
Natural Light Setup: The Foundation of Great Food Photography
Window Light: Your Best Friend
Natural light remains the gold standard for food photography, and for good reason. It’s free, readily available, and provides the soft, even illumination that makes food look naturally appetizing.
Step 1: Choose the Right Window Look for large windows that face north (in the Northern Hemisphere) or south (in the Southern Hemisphere). These windows provide consistent, indirect light throughout the day without harsh directional shadows. East or west-facing windows work during specific times but require more careful timing.
Step 2: Position Your Subject Place your food setup 2-6 feet away from the window. Too close, and you’ll get harsh directional light; too far, and the light becomes too dim and flat. The sweet spot varies depending on the size of your window and the time of day.
Step 3: Control the Light Direction
- Side lighting: Position your setup perpendicular to the window for dramatic side lighting that emphasizes texture
- Back lighting: Place the food between you and the window for beautiful rim lighting and translucent effects
- Front lighting: Position yourself between the window and food for even, flat lighting (use sparingly)
Modifying Natural Light
Even perfect window light often needs some modification to achieve professional results.
Diffusion Techniques:
- Hang a sheer white curtain or professional diffusion material in front of the window
- Use a large white foam board at a 45-degree angle to bounce soft light onto your subject
- Professional diffusion panels provide more control but require investment
Fill Light Solutions:
- White foam boards or reflectors to fill in shadows on the opposite side of your main light source
- Silver reflectors for more dramatic fill light
- Mirrors for precise, bright fill light (use carefully to avoid hotspots)
Artificial Lighting Setup: Professional Control
Essential Equipment for Artificial Food Photography Lighting
When natural light isn’t available or sufficient, artificial lighting gives you complete control over your food photography environment.
Key Light Sources:
- LED Panel Lights: Consistent color temperature, adjustable brightness, cool operation
- Softbox Strobes: Powerful, professional results, require more setup time
- Continuous Fluorescent: Affordable option, what-you-see-is-what-you-get lighting
The Classic Three-Point Lighting Setup
Main Light (Key Light) Position your primary light source at a 45-degree angle above and to one side of your food. This creates appealing shadows that add dimension while maintaining good overall illumination.
Settings recommendations:
- Power: 60-80% of maximum output
- Distance: 3-4 feet from subject
- Height: 2-3 feet above table level
Fill Light Use a secondary light source or reflector to soften shadows created by your main light. This should be less intense than your key light to maintain natural-looking contrast.
Settings recommendations:
- Power: 30-50% of key light intensity
- Position: Opposite side of key light
- Angle: More direct than key light to fill shadows effectively
Background Light (Optional) A subtle light on your background can help separate your subject and create depth in your composition.
Settings recommendations:
- Power: 20-40% of key light
- Position: Behind and slightly to the side of your subject
- Focus: Aimed at background, not subject
Advanced Lighting Techniques
Rim Lighting for Drama Position a light behind your subject to create a beautiful glowing edge around your food. This technique works exceptionally well for beverages, soups, and dishes with interesting silhouettes.
Gradient Lighting Use barn doors or flags to create gradual light falloff across your scene. This adds visual interest and helps guide the viewer’s eye to the most important parts of your composition.
Texture Enhancement Lighting For foods where texture is crucial (bread, steaks, pastries), use harder light sources positioned at very low angles to emphasize surface details through controlled shadows.
Camera Settings for Food Photography
Recommended Settings for Different Lighting Conditions
Natural Light Settings:
- ISO: 400-800 (depending on available light)
- Aperture: f/8-f/11 (optimal sharpness with adequate depth of field)
- Shutter Speed: 1/60s or faster (use tripod for slower speeds)
Artificial Light Settings:
- ISO: 100-400 (lower noise with controlled lighting)
- Aperture: f/5.6-f/8 (balance between sharpness and depth of field)
- Shutter Speed: Varies based on light type (strobes vs. continuous)
Equipment Recommendations
For serious food photography, investing in quality camera equipment makes a significant difference. The Sony A7 IV offers exceptional image quality, excellent low-light performance, and the dynamic range needed for challenging food photography lighting situations.
| Specification | Sony A7 IV |
|---|---|
| Sensor | 33MP Full-Frame |
| ISO Range | 100-51200 (expandable to 204800) |
| Image Stabilization | 5-axis in-body |
| Video | 4K60p / 4K120p |
| Autofocus Points | 759 phase-detection |
| Price Range | $2,200-$2,500 |
Lighting Modifiers and Accessories
Essential Modifiers for Food Photography
Softboxes Large softboxes (24”x36” or larger) create beautiful, even light that’s perfect for food photography. They provide directional control while maintaining soft quality.
Umbrellas More affordable than softboxes, umbrellas create softer light but with less directional control. White umbrellas provide soft fill light, while silver umbrellas offer more contrast.
Beauty Dishes These create a unique quality of light that’s softer than direct light but more directional than softboxes. Excellent for highlighting specific areas of your composition.
Reflectors and Flags
- White reflectors: Soft fill light
- Silver reflectors: Brighter, more contrasty fill
- Gold reflectors: Warm fill light for cozy food scenes
- Black flags: Remove unwanted light and create controlled shadows
Common Lighting Mistakes and How to Avoid Them
Overhead Flash: The Cardinal Sin
Direct on-camera flash is perhaps the worst lighting choice for food photography. It creates harsh shadows, eliminates texture, and makes food look flat and unappetizing. Always use diffused, directional lighting instead.
Overly Flat Lighting
While harsh shadows are problematic, completely eliminating all shadows makes food look two-dimensional. Maintain some contrast to show texture and form.
Inconsistent Color Temperature
Mixing different types of light sources without proper color correction creates unnatural color casts. Stick to one type of light source or use color correction gels to match temperatures.
Ignoring Background Lighting
Neglecting to light your background properly can result in muddy, distracting backgrounds that compete with your food subject.
Step-by-Step Setup Guide
Basic Natural Light Setup
Equipment Needed:
- Large window with good light
- White foam board or reflector
- Tripod
- Camera with manual controls
Step 1: Position your table perpendicular to the window Step 2: Place your styled food on the table Step 3: Position a white reflector opposite the window to fill shadows Step 4: Adjust the reflector angle to achieve desired contrast Step 5: Set camera to manual mode and adjust settings Step 6: Take test shots and adjust positioning as needed
Professional Artificial Light Setup
Equipment Needed:
- 2-3 light sources (LED panels or strobes)
- Softboxes or umbrellas
- Light stands
- Reflectors
- Light meter (optional but recommended)
Step 1: Set up your main light at 45-degree angle to subject Step 2: Add fill light on opposite side at lower intensity Step 3: Position background light if desired Step 4: Test lighting balance with meter or camera Step 5: Fine-tune positions and power settings Step 6: Shoot and adjust as needed
Troubleshooting Common Issues
Too Much Contrast
If your shadows are too dark, add more fill light or move your main light further away. You can also use a larger light source for softer shadows.
Not Enough Contrast
If your image looks flat, reduce fill light intensity or move it further away. Consider adding flags to block some light and create more defined shadows.
Color Cast Issues
Check your white balance settings and ensure all light sources have consistent color temperature. Use custom white balance for mixed lighting situations.
Hotspots and Reflections
Shiny surfaces in food can create unwanted reflections. Use polarizing filters, adjust light angles, or apply anti-shine spray to problematic surfaces.
Advanced Tips for Professional Results
Seasonal Lighting Considerations
Adapt your lighting setup to match the mood of seasonal foods. Warm, cozy lighting for winter comfort foods, bright and airy lighting for summer salads and fresh ingredients.
Styling Integration
Work closely with food stylists to ensure your lighting enhances their work. Communicate about texture emphasis, color enhancement, and mood requirements.
Consistency Across Series
When shooting for menus or series work, maintain consistent lighting setups. Document your successful setups with photos and notes for future reference.
Post-Processing Lighting Corrections
Essential Adjustments
Even perfect lighting often benefits from post-processing refinement:
- Exposure correction: Fine-tune overall brightness
- Highlight/shadow recovery: Balance extreme tones
- Color temperature adjustment: Perfect the mood
- Local adjustments: Enhance specific areas with masking
Maintaining Natural Look
Avoid over-processing that makes your lighting look artificial. The goal is to enhance what you captured, not completely recreate the lighting in post-production.
Conclusion
Mastering food photography lighting is a journey that combines technical knowledge with artistic vision. Start with natural light setups to understand the fundamentals, then gradually incorporate artificial lighting as your skills and needs develop.
Remember that the best lighting setup is the one that serves your creative vision while making the food look irresistibly delicious. Whether you’re using a simple window light setup or a complex multi-light arrangement, focus on creating soft, directional light that enhances texture and color while maintaining the natural appeal of your culinary subjects.
Practice with different lighting scenarios, document what works, and don’t be afraid to experiment. With consistent practice and attention to these lighting principles, you’ll develop the skills to create food photography that not only showcases dishes beautifully but also tells compelling culinary stories that engage and inspire your audience.
The investment in proper lighting equipment and techniques will pay dividends in the quality and marketability of your food photography. Start with the basics, build your kit gradually, and always prioritize understanding light over accumulating gear. Great food photography lighting is about seeing and shaping light effectively, not just owning expensive equipment.
Related Tags
Looking for the Best Camera Deals?
Check out our latest buying guides and comparison articles to find the perfect camera for your needs.
Browse Buying Guides