Wildlife Photography Tips: Master Techniques for Stunning Shots
Learn essential wildlife photography techniques, camera settings, and expert tips to capture amazing animal photos. Perfect guide for beginners and pros.
Introduction to Wildlife Photography
Wildlife photography represents one of the most challenging yet rewarding genres in the world of photography. Capturing animals in their natural habitat requires a unique combination of technical skill, patience, fieldcraft knowledge, and sometimes a bit of luck. Whether you’re photographing birds in your backyard or tracking big game on an African safari, the principles remain consistent: understand your subjects, master your equipment, and be prepared for the unexpected.
This comprehensive guide will walk you through everything you need to know to elevate your wildlife photography, from essential gear selection to advanced field techniques that will help you create stunning images while respecting the animals and their environment.
Essential Wildlife Photography Equipment
Camera Body Requirements
The foundation of successful wildlife photography starts with choosing the right camera body. Modern mirrorless and DSLR cameras both excel in different areas, but several key features are non-negotiable for serious wildlife work.
Autofocus Performance: Wildlife rarely stays still, making fast and accurate autofocus crucial. Look for cameras with advanced tracking systems that can lock onto and follow moving subjects. The Sony A7 IV exemplifies this with its 759-point phase-detection autofocus system and real-time animal eye detection.
Burst Rate and Buffer: Animals move unpredictably, and the perfect moment often lasts mere milliseconds. A high continuous shooting rate (8+ fps) paired with a large buffer ensures you don’t miss the decisive moment when a bird takes flight or a predator strikes.
Weather Sealing: Wildlife photography often takes place in challenging conditions. Dust, moisture, and temperature extremes are common, making weather-resistant construction essential for equipment longevity.
Lens Selection Strategy
Telephoto Lenses: The cornerstone of wildlife photography is reach. A 400mm lens should be considered the minimum for serious wildlife work, with 600mm or longer being ideal for skittish subjects. Modern telephoto lenses with image stabilization can provide 4-5 stops of shake reduction, crucial when handholding heavy glass.
Aperture Considerations: While f/2.8 telephotos offer superior low-light performance and subject isolation, f/4 and f/5.6 options provide excellent image quality at a fraction of the weight and cost. Consider your typical shooting conditions and physical limitations when making this choice.
Zoom vs. Prime Trade-offs: Zoom lenses offer versatility for varying distances and compositions, while prime lenses typically provide superior optical quality and wider apertures. A 100-400mm zoom paired with a 600mm prime covers most wildlife scenarios effectively.
Support Systems and Accessories
Tripods and Heads: Proper support becomes critical with telephoto lenses over 400mm. Carbon fiber tripods offer the best strength-to-weight ratio, while gimbal heads provide smooth tracking of moving subjects with heavy lenses.
Flash and Lighting: While natural light is preferred, fill flash can rescue shadow detail in backlit situations or add catchlight to eyes. Use flash sparingly and never in ways that stress or disorient animals.
Camera Settings for Wildlife Photography
Autofocus Configuration
Modern cameras offer numerous autofocus modes, but wildlife photography demands specific configurations for consistent results.
Single Point vs. Zone AF: Start with single-point autofocus for stationary subjects, ensuring precise focus on the eye. Switch to zone or wide-area AF when tracking moving animals, allowing the camera’s AI to maintain focus as the subject moves between focus points.
Continuous vs. Single-Shot AF: Use continuous autofocus (AI Servo/AF-C) for any subject that might move. Even seemingly stationary animals can shift position unexpectedly, and continuous AF ensures your camera adapts instantly.
Custom AF Settings: Take advantage of subject tracking sensitivity and focus priority settings. Reduce tracking sensitivity for erratic subjects like small birds, and prioritize focus over release for sharp images rather than blurry action sequences.
Exposure Mode Selection
Shutter Priority (S/Tv Mode): This mode gives you direct control over motion blur while letting the camera select the appropriate aperture. Essential for flying birds or running mammals where specific shutter speeds are critical.
Manual Mode with Auto ISO: Provides complete creative control while maintaining proper exposure as lighting conditions change. Set your desired aperture for depth of field, choose the appropriate shutter speed for your subject, and let Auto ISO handle exposure compensation.
Aperture Priority Considerations: Useful for stationary subjects where depth of field control takes precedence over motion stopping power. Monitor your shutter speed to ensure it remains fast enough for sharp handheld images.
Optimal Settings by Subject Type
Small Birds: 1/1000s minimum shutter speed, f/5.6-f/8 for adequate depth of field, ISO as needed for proper exposure. Use high-speed continuous AF and burst mode.
Large Mammals: 1/500s for stationary subjects, 1/1000s+ for running animals, f/4-f/5.6 for subject isolation, moderate ISO to maintain image quality.
Flying Birds: 1/1600s+ shutter speed, f/5.6-f/8 for forgiveness in focus plane, high ISO acceptable for proper exposure, continuous AF with subject tracking.
Field Techniques and Strategies
Animal Behavior Understanding
Successful wildlife photography requires more than technical prowess—it demands intimate knowledge of animal behavior patterns. Study your subjects before heading into the field. Learn feeding schedules, territorial boundaries, mating seasons, and daily routines. This knowledge allows you to anticipate behavior and position yourself for optimal shots.
Seasonal Considerations: Different seasons offer unique opportunities. Spring brings nesting behaviors and vibrant plumage, summer offers abundant food sources and active young animals, autumn provides migration patterns and territorial displays, while winter creates survival drama and stark compositions.
Time of Day Strategy: The golden hours around sunrise and sunset provide the most flattering light, but don’t ignore midday opportunities. Many predators are active during harsh light, and overcast conditions can provide beautiful, even illumination for detailed portraits.
Fieldcraft and Approach Techniques
Camouflage and Concealment: Blend into your environment using appropriate clothing colors and patterns. Avoid sudden movements and maintain awareness of wind direction to prevent your scent from reaching sensitive animals.
Patience and Positioning: Arrive early and stay late. Animals are most active during transition periods, and the best shots often come to those who wait. Position yourself with favorable lighting and backgrounds before animals arrive.
Distance and Respect: Use longer lenses to maintain respectful distances rather than approaching too closely. Stressed animals produce poor photographs, and ethical considerations should always take precedence over getting the shot.
Composition Strategies in the Wild
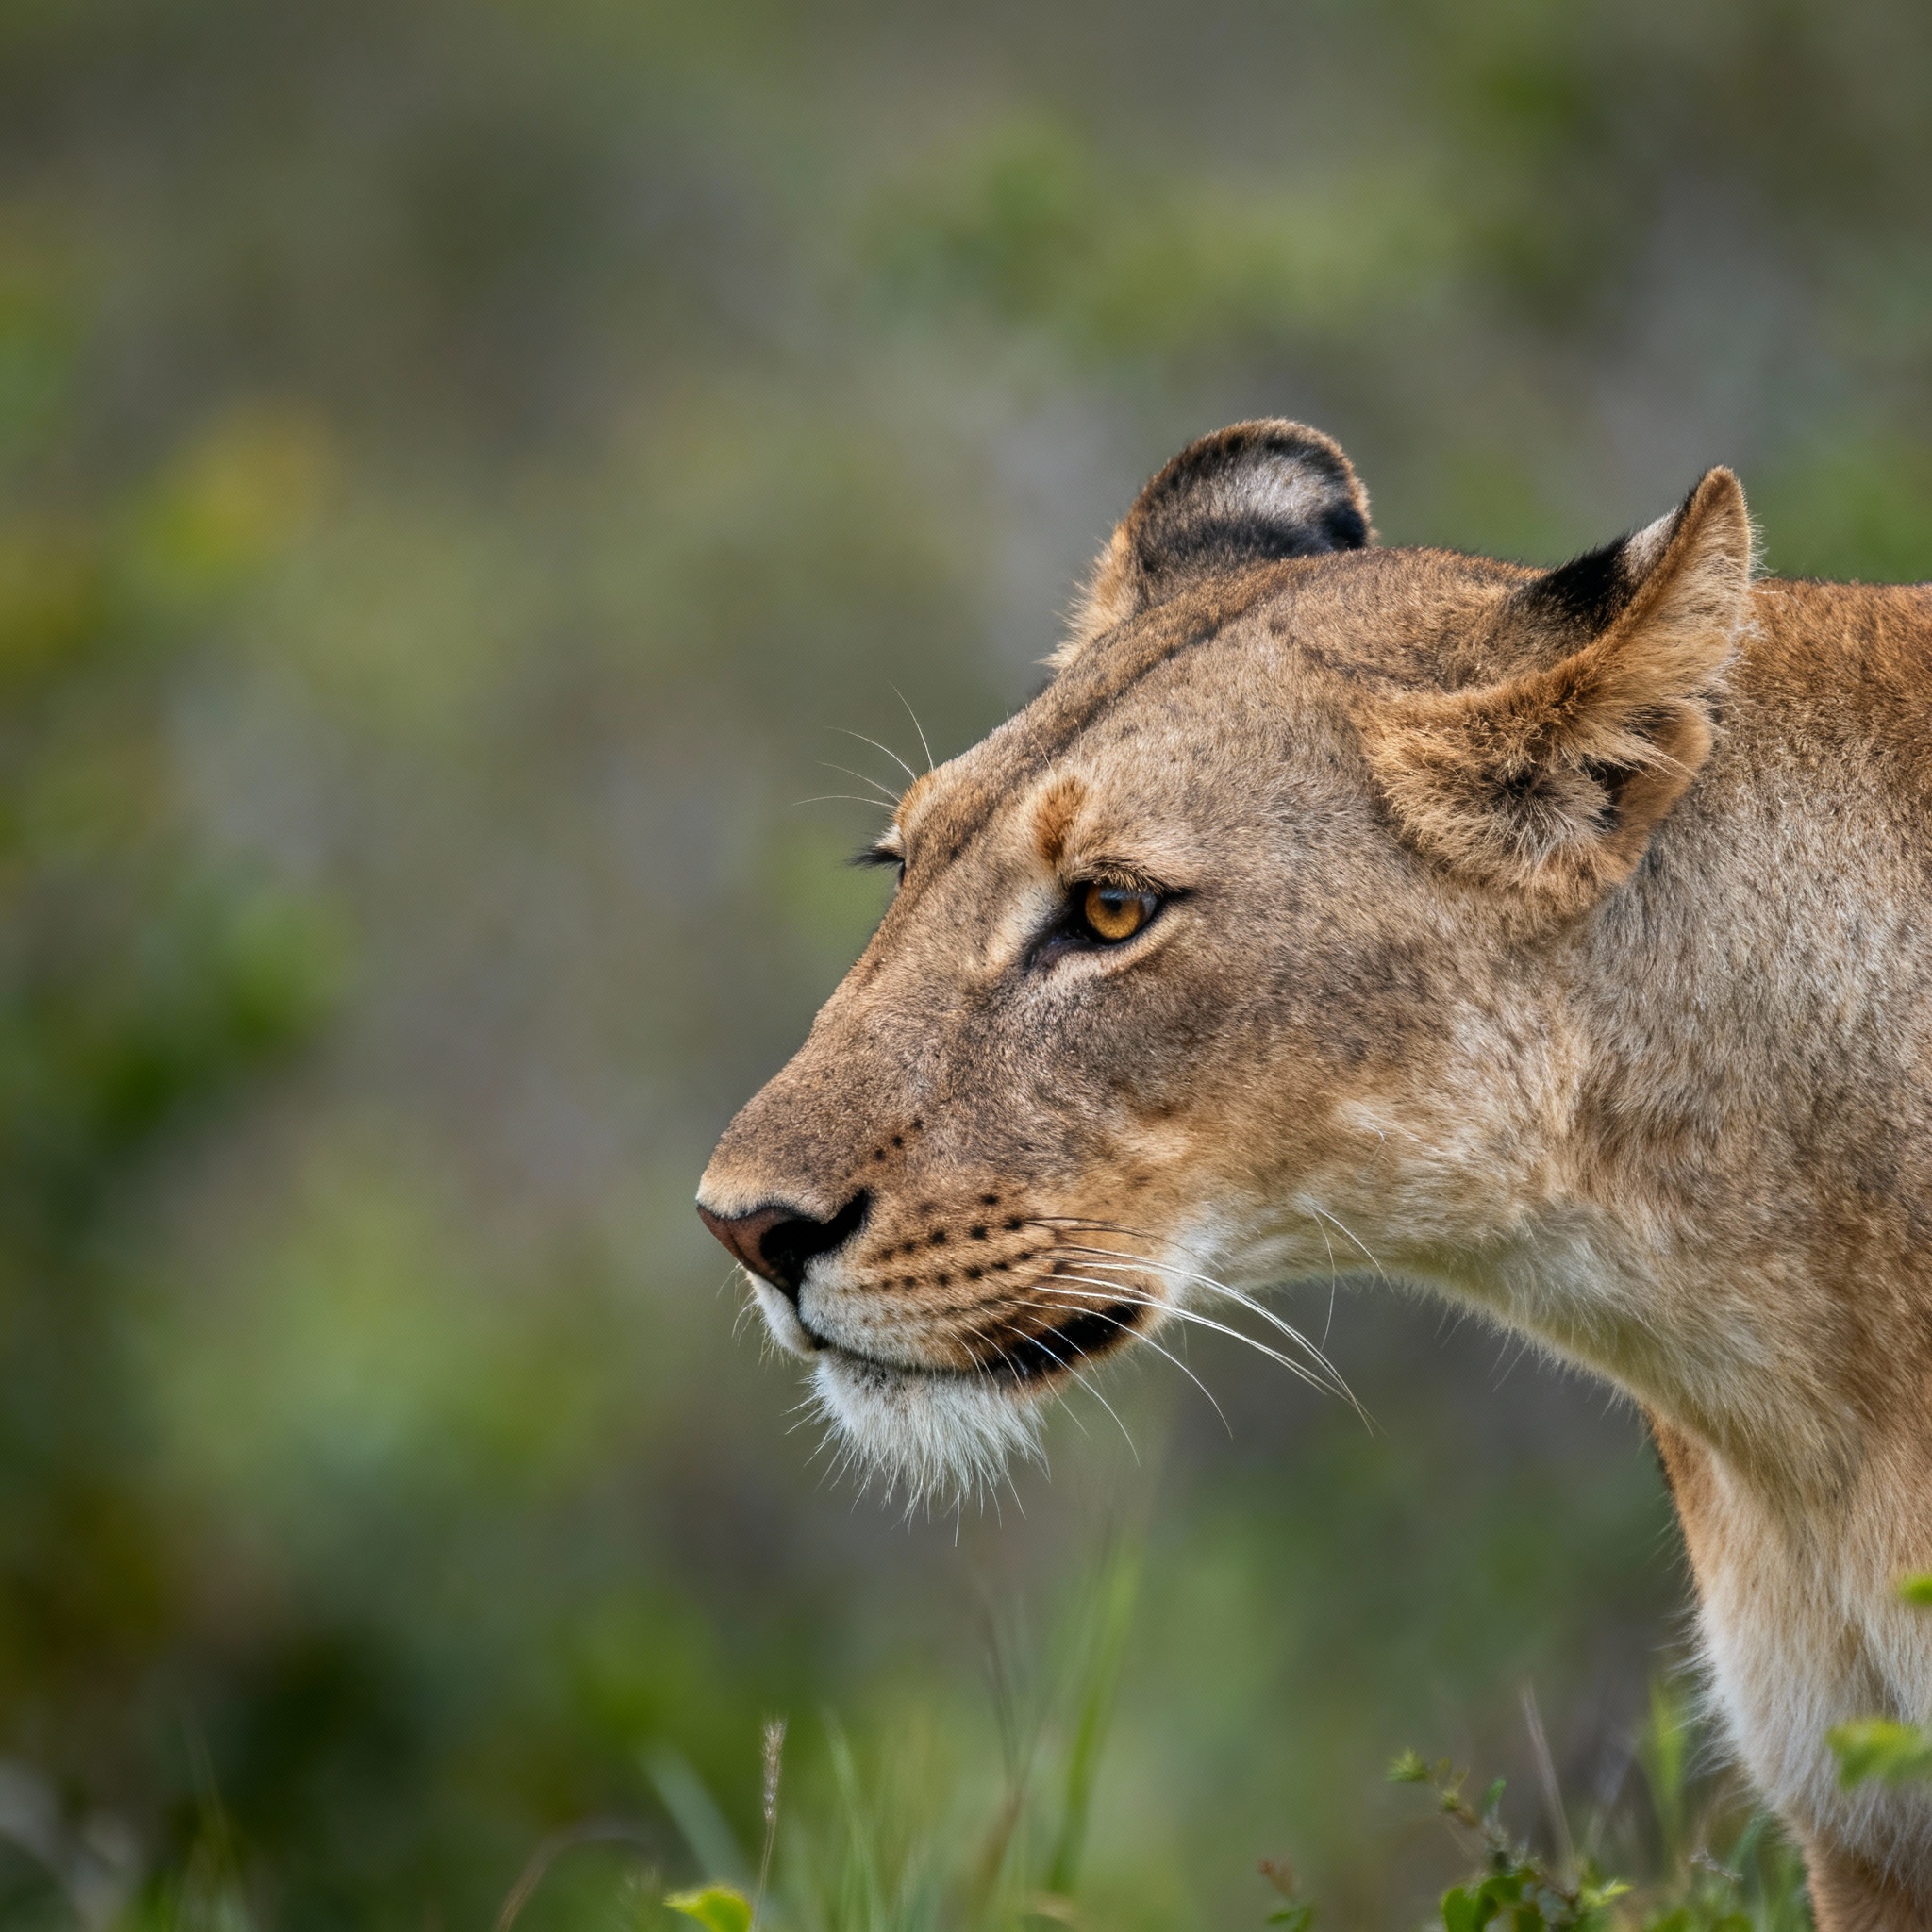
Eye-Level Perspectives: Whenever possible, photograph animals at their eye level rather than shooting down from human height. This creates more intimate, engaging images that connect viewers with the subject.
Environmental Context: While tight portraits have their place, don’t forget to show animals in their habitat. Wide-angle wildlife photography can tell powerful stories about conservation and natural behavior.
Rule of Thirds and Beyond: Apply traditional composition rules but be ready to break them when the situation demands. Action sequences might require central placement, while behavioral shots benefit from thoughtful subject placement within the frame.
Advanced Wildlife Photography Techniques
Motion and Action Capture
Panning Techniques: For running or flying animals, practice smooth panning motions. Use slower shutter speeds (1/60s to 1/250s) to create motion blur in the background while keeping the subject sharp. This technique requires significant practice but produces dynamic, energetic images.
Predictive Focusing: Learn to anticipate where fast-moving animals will be rather than chasing them with your focus point. Pre-focus on a spot where you expect the action to occur, such as a hummingbird’s favorite flower or a hawk’s preferred perch.
Burst Mode Strategy: Don’t just hold down the shutter and hope for the best. Use burst mode strategically during peak action moments, but be selective to avoid overwhelming yourself with thousands of similar images.
Low Light Photography
High ISO Performance: Modern cameras handle high ISOs remarkably well. Don’t be afraid to push ISO to 6400 or higher if it means capturing sharp images in challenging light. Noise can be reduced in post-processing, but blur cannot be fixed.
Image Stabilization Utilization: Combine lens-based and in-body image stabilization when available. This combination can provide up to 7 stops of shake reduction, allowing handheld telephoto photography in surprisingly low light conditions.
Creative Use of Available Light: Embrace dramatic lighting conditions rather than waiting for perfect conditions. Rim lighting, silhouettes, and moody atmospheric conditions can create powerful, artistic images.
Post-Processing for Wildlife Images
RAW Processing Fundamentals
Always shoot in RAW format for wildlife photography. The additional data captured allows for significant exposure and color adjustments that are impossible with JPEG files. Pay particular attention to shadow and highlight recovery, which can rescue detail in challenging lighting situations.
Noise Reduction Strategies: Apply noise reduction judiciously, as over-processing can eliminate fine detail like fur texture and feather patterns. Modern AI-based noise reduction tools like Topaz DeNoise or Adobe’s new AI features provide excellent results while preserving detail.
Sharpening Techniques: Wildlife images often benefit from careful sharpening, particularly when shot at high ISOs or with teleconverters. Use masking to apply sharpening only to detail areas while avoiding smooth regions like sky or out-of-focus backgrounds.
Color and Exposure Optimization
Natural Color Rendition: Resist the temptation to over-saturate wildlife images. Maintain realistic colors that accurately represent the animal and its environment. Use selective color adjustments to enhance key areas like eyes or plumage without affecting the entire image.
Exposure Fine-tuning: Use graduated filters and radial adjustments to balance exposure across the frame. Slightly underexpose during capture to preserve highlight detail, then lift shadows in post-processing for optimal dynamic range.
Safety and Ethical Considerations
Wildlife Photography Ethics
The welfare of your subjects must always take precedence over getting the photograph. Never harass, bait, or stress animals for the sake of an image. Maintain appropriate distances and retreat if animals show signs of distress or aggressive behavior.
Nesting Season Sensitivity: Exercise extreme caution around nesting birds and denning mammals. Even well-intentioned photographers can cause nest abandonment or expose young animals to predation through disturbance.
Leave No Trace Principles: Respect the environment by staying on designated trails, packing out all trash, and avoiding damage to vegetation. Your behavior reflects on all wildlife photographers and affects future access to sensitive areas.
Personal Safety Protocols
Large Animal Encounters: Understand the behavior and danger signs of potentially dangerous animals in your shooting area. Carry appropriate deterrents like bear spray when photographing in areas with large predators.
Environmental Hazards: Be aware of changing weather conditions, tide schedules, and terrain challenges. Inform others of your photography plans and expected return times when venturing into remote areas.
Common Mistakes and How to Avoid Them
Technical Errors
Insufficient Shutter Speed: The most common technical mistake is using shutter speeds too slow for the subject. When in doubt, err on the side of faster speeds. A sharp image at high ISO is superior to a blurry image at low ISO.
Focus on the Wrong Body Part: Always prioritize the eyes in your compositions. If the eyes aren’t sharp, the image typically fails regardless of other technical merits. Use single-point autofocus and manually select the focus point for critical shots.
Ignoring Background Elements: Pay attention to your background before pressing the shutter. Distracting elements like branches growing out of the animal’s head or cluttered backgrounds can ruin otherwise excellent images.
Behavioral Mistakes
Approaching Too Quickly: Take your time when approaching wildlife. Sudden movements or direct approaches often result in the animal fleeing before you can capture quality images. Use indirect approaches and allow animals to become comfortable with your presence.
Poor Timing: Learn to read animal body language and anticipate behavior. Feeding, grooming, and social interactions provide the most compelling photographs, but they require patience and observation skills to capture effectively.
Building Your Wildlife Photography Skills
Practice Opportunities
Start your wildlife photography journey close to home. Urban wildlife, backyard birds, and local parks provide excellent training opportunities without the expense and complexity of exotic locations. Master your techniques on accessible subjects before tackling more challenging scenarios.
Zoo and Wildlife Sanctuary Photography: While not true wild animals, captive subjects allow you to practice technique without the unpredictability of field conditions. Focus on behavior, composition, and technical execution while developing your skills.
Bird Photography Progression: Begin with larger, less skittish species before attempting small songbirds or fast-flying species. Waterfowl, raptors, and wading birds are generally more tolerant of photographers and provide excellent learning opportunities.
Continuous Learning Resources
Join local photography groups, attend workshops, and participate in online communities dedicated to wildlife photography. Learning from experienced practitioners accelerates your skill development and provides valuable insights into animal behavior and field techniques.
Field Guide Utilization: Invest in quality field guides for your target species. Understanding animal behavior, habitat preferences, and seasonal patterns dramatically improves your success rate and image quality.
Conclusion and Final Recommendations
Wildlife photography represents one of photography’s most challenging and rewarding pursuits. Success requires a combination of technical expertise, field craft skills, ethical awareness, and above all, patience and persistence. The techniques outlined in this guide provide a foundation for developing your skills, but remember that each species and situation presents unique challenges requiring adaptability and creative problem-solving.
Start with readily accessible subjects to build your technical skills and confidence before investing in expensive expeditions to exotic locations. Focus on understanding animal behavior as much as camera settings—the best technical execution cannot compensate for poor timing or positioning.
Most importantly, always prioritize the welfare of your subjects and their environment over getting the photograph. Ethical wildlife photography not only protects the animals we love to photograph but also ensures these opportunities remain available for future generations of photographers and wildlife enthusiasts.
The Sony A7 IV mentioned earlier represents an excellent starting point for serious wildlife photography, offering professional-level performance in a relatively compact package. However, remember that the best camera is the one you have with you when wildlife appears—start photographing with whatever equipment you currently own and upgrade as your skills and commitment to the craft develop.
With dedication, practice, and respect for your subjects, wildlife photography can provide a lifetime of learning, adventure, and the opportunity to create images that celebrate the natural world’s incredible diversity and beauty.
Related Tags
Looking for the Best Camera Deals?
Check out our latest buying guides and comparison articles to find the perfect camera for your needs.
Browse Buying Guides